App Development
This documentation covers the development of custom apps (plugins) for Nautobot. Nautobot apps are essentially self-contained Django applications which integrate with Nautobot to provide custom functionality. Since the development of Django applications is already very well-documented, this will only be covering the aspects that are specific to Nautobot.
Apps can do a lot of different things, all of which will be covered in detail in this document. Keep in mind that each piece of functionality is entirely optional. For example, if your app merely adds a piece of middleware or an API endpoint for existing data, there's no need to define any new models.
Changed in version 1.5.2
The nautobot.apps namespace was added in Nautobot 1.5.2. If developing apps to be backwards-compatible with older versions of Nautobot, please refer to the app developer documentation of your required Nautobot version.
Tip
The app detail view (/plugins/installed-plugins/<plugin_name>/, accessible to superusers via Plugins -> Installed Plugins in the navigation menu, then selecting a specific app) provides in-depth information about which features any installed app is implementing or making use of.
Initial Setup
Use a Development Environment, Not Production For App Development
You should not use your production environment for app development. For information on getting started with a development environment, check out Nautobot development guide.
App Structure
Although the specific structure of an app is largely left to the discretion of its authors, a Nautobot app that makes use of all available app features described in this document could potentially look something like this:
app_name/
  - app_name/
    - __init__.py           # required
    - admin.py              # Django Admin Interface
    - api/
      - serializers.py      # REST API Model serializers
      - urls.py             # REST API URL patterns
      - views.py            # REST API view sets
    - banner.py             # Banners
    - custom_validators.py  # Custom Validators
    - datasources.py        # Loading Data from a Git Repository
    - filter_extensions.py  # Extending Filters
    - filters.py            # Filtersets for UI, REST API, and GraphQL Model Filtering
    - forms.py              # UI Forms and Filter Forms
    - graphql/
      - types.py            # GraphQL Type Objects
    - homepage.py           # Home Page Content
    - jinja_filters.py      # Jinja Filters
    - jobs.py               # Job classes
    - middleware.py         # Request/response middleware
    - migrations/
      - 0001_initial.py     # Database Models
    - models.py             # Database Models
    - navigation.py         # Navigation Menu Items
    - secrets.py            # Secret Providers
    - signals.py            # Signal Handler Functions
    - template_content.py   # Extending Core Templates
    - templates/
      - app_name/
        - *.html            # UI content templates
    - urls.py               # UI URL Patterns
    - views.py              # UI Views and any view override definitions
  - pyproject.toml          # *** REQUIRED *** - Project package definition
  - README.md
The top level is the project root. Immediately within the root should exist several items:
pyproject.toml- This is the new unified Python project settings file that replacessetup.py,requirements.txt, and various other setup files (likesetup.cfg,MANIFEST.in, among others).README.md- A brief introduction to your app, how to install and configure it, where to find help, and any other pertinent information. It is recommended to write README files using a markup language such as Markdown.- The app source directory, with the same name as your app.
The app source directory contains all of the actual Python code and other resources used by your app. Its structure is left to the author's discretion, however it is recommended to follow best practices as outlined in the Django documentation. At a minimum, this directory must contain an __init__.py file containing an instance of Nautobot's NautobotAppConfig class.
Note
Nautobot includes a command to help create the app directory:
nautobot-server startplugin [app_name]
Please see the Nautobot Server Guide for more information.
Create pyproject.toml
Poetry Init (Recommended)
To get started with a project using Python Poetry you use the poetry init command. This will guide you through the prompts necessary to generate a pyproject.toml with details required for packaging.
This command will guide you through creating your pyproject.toml config.

Package name [tmp]:  nautobot-animal-sounds
Version [0.1.0]:
Description []:  An example Nautobot app
Author [, n to skip]:  Bob Jones
License []:  Apache 2.0
Compatible Python versions [^3.8]:  ^3.7

Would you like to define your main dependencies interactively? (yes/no) [yes] no
Would you like to define your development dependencies interactively? (yes/no) [yes] no
Generated file

[tool.poetry]
name = "nautobot-animal-sounds"
version = "0.1.0"
description = "An example Nautobot app"
authors = ["Bob Jones"]
license = "Apache 2.0"

[tool.poetry.dependencies]
python = "^3.7"

[tool.poetry.dev-dependencies]

[build-system]
requires = ["poetry-core>=1.0.0"]
build-backend = "poetry.core.masonry.api"


Do you confirm generation? (yes/no) [yes]
Define a NautobotAppConfig
The NautobotAppConfig class is a Nautobot-specific wrapper around Django's built-in AppConfig class. It is used to declare Nautobot app functionality within a Python package. Each app should provide its own subclass, defining its name, metadata, and default and required configuration parameters. An example is below:
from nautobot.apps import NautobotAppConfig

class AnimalSoundsConfig(NautobotAppConfig):
    name = 'nautobot_animal_sounds'
    verbose_name = 'Animal Sounds'
    description = 'An example app for development purposes'
    version = '0.1'
    author = 'Bob Jones'
    author_email = 'bob@example.com'
    base_url = 'animal-sounds'
    required_settings = []
    default_settings = {
        'loud': False
    }

config = AnimalSoundsConfig
Nautobot looks for the config variable within an app's __init__.py to load its configuration. Typically, this will be set to the NautobotAppConfig subclass, but you may wish to dynamically generate a NautobotAppConfig class based on environment variables or other factors.
Required NautobotAppConfig Attributes
| Name | Description |
|---|---|
author |
Name of app's author |
author_email |
Author's public email address |
description |
Brief description of the app's purpose |
name |
Raw app name; same as the app's source directory |
verbose_name |
Human-friendly name for the app |
version |
Current release (semantic versioning is encouraged) |
Optional NautobotAppConfig Attributes
| Name | Default | Description |
|---|---|---|
base_url |
Same as specified name |
Base path to use for app URLs |
caching_config |
{"*":{"ops":"all"}} |
App-specific query caching configuration |
config_view_name |
None |
URL name for a "configuration" view defined by this app |
default_settings |
{} |
A dictionary of configuration parameters and their default values |
home_view_name |
None |
URL name for a "home" or "dashboard" view defined by this app |
docs_view_name |
None |
URL name for a "documentation" view defined by this app |
installed_apps |
[] |
A list of additional Django application dependencies to automatically enable when the app is activated (you must still make sure these underlying dependent libraries are installed) |
max_version |
None |
Maximum version of Nautobot with which the app is compatible |
middleware |
[] |
A list of middleware classes to append after Nautobot's built-in middleware |
min_version |
None |
Minimum version of Nautobot with which the app is compatible |
required_settings |
[] |
A list of any configuration parameters that must be defined by the user |
Note
All required_settings must be configured in PLUGINS_CONFIG in nautobot_config.py before the app can be used.
Warning
If a configuration parameter is listed in both required_settings and default_settings, the default setting will be ignored.
NautobotAppConfig Code Location Attributes
The following NautobotAppConfig attributes can be configured to customize where Nautobot will look to locate various pieces of app code. In most cases you will not need to change these, but they are provided as options in case your app has a non-standard organizational structure.
Info
As used below, a "dotted path" is the combination of a Python module path within the app and the name of a variable within that module. For example, "template_content.template_extensions" refers to a variable named template_extensions inside a template_content module located at the root of the app.
| Name | Default | Description |
|---|---|---|
banner_function |
"banner.banner" |
Dotted path to a function that can render a custom banner |
custom_validators |
"custom_validators.custom_validators" |
Dotted path to a list of custom validator classes |
datasource_contents |
"datasources.datasource_contents" |
Dotted path to a list of datasource (Git, etc.) content types to register |
graphql_types |
graphql.types.graphql_types |
Dotted path to a list of GraphQL type classes |
homepage_layout |
"homepage.layout" |
Dotted path to a list of home page items provided by the app |
jinja_filters |
"jinja_filters" |
Path to a module that contains Jinja2 filters to be registered |
jobs |
"jobs.jobs" |
Dotted path to a list of Job classes |
menu_items |
"navigation.menu_items" |
Dotted path to a list of navigation menu items provided by the app |
secrets_providers |
"secrets.secrets_providers" |
Dotted path to a list of secrets providers in the app |
template_extensions |
"template_content.template_extensions" |
Dotted path to a list of template extension classes |
Install the App for Development
The app needs to be installed into the same python environment where Nautobot is, so that we can get access to nautobot-server command, and also so that the nautobot-server is aware of the new app.
If you installed Nautobot using Poetry, then go to the root directory of your clone of the Nautobot repository and run poetry shell there. Afterward, return to the root directory of your app to continue development.
Otherwise if using the pip install or Docker workflows, manually activate nautobot using source /opt/nautobot/bin/activate.
To install the app for development the following steps should be taken:
- Activate the Nautobot virtual environment (as detailed above)
- Navigate to the project root, where the
pyproject.tomlfile exists for the app - Execute the command
poetry installto install the local package into the Nautobot virtual environment
Note
Poetry installs the current project and its dependencies in editable mode (aka "development mode").
This should be done in development environment
You should not use your production environment for app development. For information on getting started with a development environment, check out Nautobot development guide.
Once the app has been installed, add it to the configuration for Nautobot:
Verify that the App is Installed
After restarting the Nautobot server, the newly installed app should appear in Plugins -> Installed Plugins if everything is configured correctly. You can also click on the app's name in this table to view more detailed information about this app based on its NautobotAppConfig and other contents.
Extending the Existing Nautobot UI
Extending Object Detail Views
Apps can inject custom content into certain areas of the detail views of applicable models. This is accomplished by subclassing TemplateExtension, designating a particular Nautobot model, and defining the desired methods to render custom content. Four methods are available:
left_page()- Inject content on the left side of the pageright_page()- Inject content on the right side of the pagefull_width_page()- Inject content across the entire bottom of the pagebuttons()- Add buttons to the top of the pagedetail_tabs()- Add extra tabs to the end of the list of tabs within the page tabs navigation
Additionally, a render() method is available for convenience. This method accepts the name of a template to render, and any additional context data you want to pass. Its use is optional, however.
When a TemplateExtension is instantiated, context data is assigned to self.context. Available data include:
object- The object being viewedrequest- The current requestsettings- Global Nautobot settingsconfig- App-specific configuration parameters
For example, accessing {{ request.user }} within a template will return the current user.
Declared subclasses should be gathered into a list or tuple for integration with Nautobot. By default, Nautobot looks for an iterable named template_extensions within a template_content.py file. (This can be overridden by setting template_extensions to a custom value on the app's NautobotAppConfig.) An example is below.
# template_content.py
from django.urls import reverse
from nautobot.apps.ui import TemplateExtension

from .models import Animal


class SiteAnimalCount(TemplateExtension):
    """Template extension to display animal count on the right side of the page."""

    model = 'dcim.site'

    def right_page(self):
        return self.render('nautobot_animal_sounds/inc/animal_count.html', extra_context={
            'animal_count': Animal.objects.count(),
        })


class DeviceExtraTabs(TemplateExtension):
    """Template extension to add extra tabs to the object detail tabs."""

    model = 'dcim.device'

    def detail_tabs(self):
        """
        You may define extra tabs to render on a model's detail page by utilizing this method.
        Each tab is defined as a dict in a list of dicts.

        For each of the tabs defined:
        - The <title> key's value will become the tab link's title.
        - The <url> key's value is used to render the HTML link for the tab

        These tabs will be visible (in this instance) on the Device model's detail page as
        set by the DeviceContent.model attribute "dcim.device"

        This example demonstrates defining two tabs. The tabs will be ordered by their position in list.
        """
        return [
            {
                "title": "App Tab 1",
                "url": reverse("plugins:example_plugin:device_detail_tab_1", kwargs={"pk": self.context["object"].pk}),
            },
            {
                "title": "App Tab 2",
                "url": reverse("plugins:example_plugin:device_detail_tab_2", kwargs={"pk": self.context["object"].pk}),
            },
        ]

template_extensions = [DeviceExtraTabs, SiteAnimalCount]
Adding Extra Tabs
Added in version 1.4.0
In order for any extra tabs to work properly, the "url" key must reference a view which inherits from the nautobot.apps.views.ObjectView class and the template must extend the object's detail template such as:
<!-- example_plugin/tab_device_detail_1.html -->
{% extends 'dcim/device.html' %}

{% block content %}
    <h2>Device App Tab 1</h2>
    <p>I am some content for the example plugin's device ({{ object.pk }}) detail tab 1.</p>
{% endblock %}
Here's a basic example of a tab's view
# views.py
from nautobot.apps.views import ObjectView
from nautobot.dcim.models import Device

class DeviceDetailAppTabOne(ObjectView):
    """
    This view's template extends the device detail template,
    making it suitable to show as a tab on the device detail page.

    Views that are intended to be for an object detail tab's content rendering must
    always inherit from nautobot.apps.views.ObjectView.
    """

    queryset = Device.objects.all()
    template_name = "example_plugin/tab_device_detail_1.html"
You must also add the view to the url_patterns like so (make sure to read the note after this code snippet):
# urls.py
from django.urls import path

from example_plugin import views

urlpatterns = [
    # ... previously defined urls
    path("devices/<uuid:pk>/example-plugin-tab-1/", views.DeviceDetailAppTabOne.as_view(), name="device_detail_tab_1"),
]
Note
For added tab views, we recommend for consistency that you follow the URL pattern established by the base model detail view and tabs (if any). For example, nautobot/dcim/urls.py references Device tab views with the URL pattern devices/<uuid:pk>/TAB-NAME/, so above we have followed that same pattern.
Adding a Banner
Added in version 1.2.0
An app can provide a function that renders a custom banner on any number of Nautobot views. By default Nautobot looks for a function banner() inside of banner.py. (This can be overridden by setting banner_function to a custom value on the app's NautobotAppConfig.)
This function currently receives a single argument, context, which is the Django request context in which the current page is being rendered. The function can return None if no banner is needed for a given page view, or can return a Banner object describing the banner contents. Here's a simple example banner.py:
# banner.py
from django.utils.html import format_html

from nautobot.apps.ui import Banner, BannerClassChoices

def banner(context, *args, **kwargs):
    """Greet the user, if logged in."""
    # Request parameters can be accessed via context.request
    if not context.request.user.is_authenticated:
        # No banner if the user isn't logged in
        return None
    else:
        return Banner(
            content=format_html("Hello, <strong>{}</strong>! 👋", context.request.user),
            banner_class=BannerClassChoices.CLASS_SUCCESS,
        )
Adding Navigation Menu Items
Apps can extend the existing navigation bar layout. By default, Nautobot looks for a menu_items list inside of navigation.py. (This can be overridden by setting menu_items to a custom value on the app's NautobotAppConfig.)
Using a key and weight system, a developer can integrate the app's menu additions amongst existing menu tabs, groups, items and buttons, and/or create entirely new menus as desired.
More documentation and examples can be found in the Navigation Menu guide.
Tip
To reduce the amount of clutter in the navigation menu, if your app provides an "app configuration" view, we recommend linking it from the main "Installed Plugins" page rather than adding it as a separate item in the navigation menu.
Similarly, if your app provides an "app home" or "dashboard" view, consider linking it from the "Installed Plugins" page, and/or adding a link from the Nautobot home page (see below), rather than adding it to the navigation menu.
Adding Home Page Content
Added in version 1.2.0
Apps can add content to the Nautobot home page. By default, Nautobot looks for a layout list inside of homepage.py. (This can be overridden by setting homepage_layout to a custom value on the app's NautobotAppConfig.)
Using a key and weight system, a developer can integrate the app content amongst existing panels, groups, and items and/or create entirely new panels as desired.
More documentation and examples can be found in the guide on Home Page Panels.
Adding Links to the Installed Apps View
Added in version 1.2.0
It's common for many apps to provide an "app configuration" view used for interactive configuration of aspects of the app that don't necessarily need to be managed by a system administrator via PLUGINS_CONFIG. The NautobotAppConfig setting of config_view_name lets you provide the URL pattern name defined for this view, which will then be accessible via a button on the Plugins -> Installed Plugins UI view.
For example, if the animal_sounds app provides a configuration view, which is set up in urls.py as follows:
# urls.py
from django.urls import path

from . import views

urlpatterns = [
    path("configuration/", views.AnimalSoundsConfigView.as_view(), name="config"),
]
then in your AnimalSoundsConfig you could refer to the view by name:
# __init__.py
from nautobot.apps import NautobotAppConfig

class AnimalSoundsConfig(NautobotAppConfig):
    # ...
    config_view_name = "plugins:animal_sounds:config"

config = AnimalSoundsConfig
and now the "Configuration" button that appears in the Installed Plugins table next to "Animal Sounds" will be a link to your configuration view.
Similarly, if your app provides an "app home" or "dashboard" view, you can provide a link for the "Home" button in the Installed Plugins table by defining home_view_name on your NautobotAppConfig class. This can also be done for documentation by defining docs_view_name on your NautobotAppConfig class.
Extending Existing Functionality
Adding Jinja2 Filters
Added in version 1.1.0
Apps can define custom Jinja2 filters to be used when rendering templates defined in computed fields. Check out the official Jinja2 documentation on how to create filter functions.
In the file that defines your filters (by default jinja_filters.py, but configurable in the NautobotAppConfig if desired), you must import the library module from the django_jinja library. Filters must then be decorated with @library.filter. See an example below that defines a filter called leet_speak.
from django_jinja import library


@library.filter
def leet_speak(input_str):
    charset = {"a": "4", "e": "3", "l": "1", "o": "0", "s": "5", "t": "7"}
    output_str = ""
    for char in input_str:
        output_str += charset.get(char.lower(), char)
    return output_str
This filter will then be available for use in computed field templates like so:
The output of this template results in the string "H3110 W0R1D".
Including Jobs
Apps can provide Jobs to take advantage of all the built-in functionality provided by that feature (user input forms, background execution, results logging and reporting, etc.).
By default, for each app, Nautobot looks for an iterable named jobs within a jobs.py file. (This can be overridden by setting jobs to a custom value on the app's NautobotAppConfig.) A brief example is below; for more details on Job design and implementation, refer to the Jobs feature documentation.
# jobs.py
from nautobot.extras.jobs import Job


class CreateDevices(Job):
    ...


class DeviceConnectionsReport(Job):
    ...


class DeviceIPsReport(Job):
    ...


jobs = [CreateDevices, DeviceConnectionsReport, DeviceIPsReport]
Implementing Custom Validators
Apps can register custom validator classes which implement model validation logic to be executed during a model's clean() method. Like template extensions, custom validators are registered to a single model and offer a method which app authors override to implement their validation logic. This is accomplished by subclassing CustomValidator and implementing the clean() method.
App authors must raise django.core.exceptions.ValidationError within the clean() method to trigger validation error messages which are propagated to the user and prevent saving of the model instance. A convenience method validation_error() may be used to simplify this process. Raising a ValidationError is no different than vanilla Django, and the convenience method will simply pass the provided message through to the exception.
When a CustomValidator is instantiated, the model instance is assigned to context dictionary using the object key, much like TemplateExtension. E.g. self.context['object'].
Declared subclasses should be gathered into a list or tuple for integration with Nautobot. By default, Nautobot looks for an iterable named custom_validators within a custom_validators.py file. (This can be overridden by setting custom_validators to a custom value on the app's NautobotAppConfig.) An example is below.
# custom_validators.py
from nautobot.apps.models import CustomValidator


class SiteValidator(CustomValidator):
    """Custom validator for Sites to enforce that they must have a Region."""

    model = 'dcim.site'

    def clean(self):
        if self.context['object'].region is None:
            # Enforce that all sites must be assigned to a region
            self.validation_error({
                "region": "All sites must be assigned to a region"
            })


custom_validators = [SiteValidator]
Loading Data from a Git Repository
It's possible for an app to register additional types of data that can be provided by a Git repository and be automatically notified when such a repository is refreshed with new data. By default, Nautobot looks for an iterable named datasource_contents within a datasources.py file. (This can be overridden by setting datasource_contents to a custom value on the app's NautobotAppConfig.) An example is below.
# datasources.py
import yaml
import os

from nautobot.extras.choices import LogLevelChoices
from nautobot.apps.datasources import DatasourceContent

from .models import Animal


def refresh_git_animals(repository_record, job_result, delete=False):
    """Callback for GitRepository updates - refresh Animals managed by it."""
    if 'nautobot_animal_sounds.Animal' not in repository_record.provided_contents or delete:
        # This repository is defined not to provide Animal records.
        # In a more complete worked example, we might want to iterate over any
        # Animals that might have been previously created by this GitRepository
        # and ensure their deletion, but for now this is a no-op.
        return

    # We have decided that a Git repository can provide YAML files in a
    # /animals/ directory at the repository root.
    animal_path = os.path.join(repository_record.filesystem_path, 'animals')
    for filename in os.listdir(animal_path):
        with open(os.path.join(animal_path, filename)) as fd:
            animal_data = yaml.safe_load(fd)

        # Create or update an Animal record based on the provided data
        animal_record, created = Animal.objects.update_or_create(
            name=animal_data['name'],
            defaults={'sound': animal_data['sound']}
        )

        # Record the outcome in the JobResult record
        job_result.log(
            "Successfully created/updated animal",
            obj=animal_record,
            level_choice=LogLevelChoices.LOG_SUCCESS,
            grouping="animals",
        )


# Register that Animal records can be loaded from a Git repository,
# and register the callback function used to do so
datasource_contents = [
    (
        'extras.gitrepository',                                  # datasource class we are registering for
        DatasourceContent(
            name='animals',                                      # human-readable name to display in the UI
            content_identifier='nautobot_animal_sounds.animal',  # internal slug to identify the data type
            icon='mdi-paw',                                      # Material Design Icons icon to use in UI
            callback=refresh_git_animals,                        # callback function on GitRepository refresh
        )
    )
]
With this code, once your app is installed, the Git repository creation/editing UI will now include "Animals" as an option for the type(s) of data that a given repository may provide. If this option is selected for a given Git repository, your refresh_git_animals function will be automatically called when the repository is synced.
Populating Extensibility Features
Added in version 1.2.0
In many cases, an app may wish to make use of Nautobot's various extensibility features, such as custom fields or relationships. It can be useful for an app to automatically create a custom field definition or relationship definition as a consequence of being installed and activated, so that everyday usage of the app can rely upon these definitions to be present.
To make this possible, Nautobot provides a custom signal, nautobot_database_ready, that apps can register to listen for. This signal is triggered when nautobot-server migrate or nautobot-server post_upgrade is run after installing an app, and provides an opportunity for the app to make any desired additions to the database at this time.
For example, maybe we want our app to make use of a Relationship allowing each Site to be linked to our Animal model. We would define our callback function that makes sure this Relationship exists, by convention in a signals.py file:
# signals.py

from nautobot.extras.choices import RelationshipTypeChoices

def create_site_to_animal_relationship(sender, apps, **kwargs):
    """Create a Site-to-Animal Relationship if it doesn't already exist."""
    # Use apps.get_model to look up Nautobot core models
    ContentType = apps.get_model("contenttypes", "ContentType")
    Relationship = apps.get_model("extras", "Relationship")
    Site = apps.get_model("dcim", "Site")
    # Use sender.get_model to look up models from this app
    Animal = sender.get_model("Animal")

    # Ensure that the Relationship exists
    Relationship.objects.update_or_create(
        slug="site-favorite-animal",
        defaults={
            "name": "Site's Favorite Animal",
            "type": RelationshipTypeChoices.TYPE_ONE_TO_MANY,
            "source_type": ContentType.objects.get_for_model(Animal),
            "source_label": "Sites that love this Animal",
            "destination_type": ContentType.objects.get_for_model(Site),
            "destination_label": "Favorite Animal",
        },
    )
Then, in the NautobotAppConfig ready() function, we connect this callback function to the nautobot_database_ready signal:
# __init__.py

from nautobot.apps import nautobot_database_ready, NautobotAppConfig

from .signals import create_site_to_animal_relationship

class AnimalSoundsConfig(NautobotAppConfig):
    # ...

    def ready(self):
        super().ready()
        nautobot_database_ready.connect(create_site_to_animal_relationship, sender=self)

config = AnimalSoundsConfig
After writing this code, run nautobot-server migrate or nautobot-server post_upgrade, then restart the Nautobot server, and you should see that this custom Relationship has now been automatically created.
Implementing Secrets Providers
Added in version 1.2.0
An app can define and register additional providers (sources) for Secrets, allowing Nautobot to retrieve secret values from additional systems or data sources. By default, Nautobot looks for an iterable named secrets_providers within a secrets.py file. (This can be overridden by setting secrets_providers to a custom value on the app's NautobotAppConfig.)
To define a new SecretsProvider subclass, we must specify the following:
- A unique
slugstring identifying this provider - A human-readable
namestring (optional; theslugwill be used if this is not specified) - A Django form for entering the parameters required by this provider, as an inner class named
ParametersForm - An implementation of the
get_value_for_secret()API to actually retrieve the value of a given secret
For a simple (insecure!) example, we could define a "constant-value" provider that simply stores a constant value in Nautobot itself and returns this value on demand.
Warning
This is an intentionally simplistic example and should not be used in practice! Sensitive secret data should never be stored directly in Nautobot's database itself.
# secrets.py
from django import forms
from nautobot.apps.secrets import SecretsProvider
from nautobot.utilities.forms import BootstrapMixin


class ConstantValueSecretsProvider(SecretsProvider):
    """
    Example SecretsProvider - this one just returns a user-specified constant value.

    Obviously this is insecure and not something you'd want to actually use!
    """

    slug = "constant-value"
    name = "Constant Value"

    class ParametersForm(BootstrapMixin, forms.Form):
        """
        User-friendly form for specifying the required parameters of this provider.
        """
        constant = forms.CharField(
            required=True,
            help_text="Constant secret value. <strong>DO NOT USE FOR REAL DATA</strong>"
        )

    @classmethod
    def get_value_for_secret(cls, secret, obj=None, **kwargs):
        """
        Return the value defined in the Secret.parameters "constant" key.

        A more realistic SecretsProvider would make calls to external APIs, etc.,
        to retrieve a secret from another system as desired.

        Args:
            secret (nautobot.extras.models.Secret): The secret whose value should be retrieved.
            obj (object): The object (Django model or similar) providing context for the secret's
                parameters.
        """
        return secret.rendered_parameters(obj=obj).get("constant")


secrets_providers = [ConstantValueSecretsProvider]
After installing and enabling your app, you should now be able to navigate to Secrets > Secrets and create a new Secret, at which point "constant-value" should now be available as a new secrets provider to use.
Extending Filters
Added in version 1.3.0
Apps can extend any model-based FilterSet and FilterForm classes that are provided by the Nautobot core.
The requirements to extend a filter set or a filter form (or both) are:
- The file must be named
filter_extensions.py - The variable
filter_extensionsmust be declared in that file, and contain a list ofFilterExtensionsubclasses - The
modelattribute of eachFilterExtensionsubclass must be set to a valid model name in the dotted pair format ({app_label}.{model}, e.g.tenant.tenantordcim.device)
Nautobot dynamically creates many additional filters based upon the defined filter type. Specifically, there are additional lookup expressions (referred to in code as lookup_expr) that are created for each filter, when there is neither a lookup_expr nor method parameter already set. These dynamically-added lookup expressions are added using a shorthand notation (e.g. icontains is ic). Nautobot will also add the negation of each, for example, so icontains will be added along with not icontains using the ic and nic expressions respectively.
The dynamically-added lookup expressions can be found in the source code at nautobot/utilities/constants.py and the mapping logic can be found in nautobot/utilities/filters.py. Please see the documentation on filtering for more information.
Tip
For developers of apps that define their own model filters, note that the above are added dynamically, as long as the class inherits from nautobot.apps.filters.BaseFilterSet.
However, that does not cover every possible use case, to list a few examples:
- Usage of a custom
methodargument on a filter that points to aFilterSetmethod, which would allow arbitrary filtering using custom logic. This is how theqfield search logic is currently performed. - Creation of a filter on a field that does not currently have filtering support
- Convenience methods for highly nested fields
There are several conditions that must be met in order to extend a filter:
- The original FilterSet must follow the pattern:
f"{model.__name__}FilterSet"e.g.TenantFilterSet - The
FilterExtension.filterset_fieldsattribute must be a valid dict, with each key being the filter name (which must start with the plugin'sname+_, e.g."example_plugin_description", not merely"description") and each value being a valid django-filter filter
Nautobot will dynamically generate the additional relevant lookup expressions of an app's defined custom FilterSet field, so no need to additionally register example_plugin_description__ic, etc.
Similar to FilterSet fields, Nautobot provides a default filter form for each model, however that does not cover every possible use case. To list a few examples of why one may want to extend a filter form:
- The base filter form does not include a custom filter defined by the app as described above
- The base filter form does not provide a specific lookup expression to a filterable field, such as allowing regex on name
There are several conditions that must be met in order to extend a filter:
- The original
FilterFormmust follow the pattern:f"{model.__name__}FilterForm", e.g.TenantFilterForm - The
filterform_fieldsattribute must be a valid dictionary of Django form fields
Note
An app is not required to define both filterset_fields and filterform_fields.
You can view an example of filter_extensions.py by viewing the one provided with the Example Plugin.
Tip
The method parameter, if used, must be a callable (method/function). Note that because filters with a method do their filtering in Python code rather than at the database level, performance of method filters is generally much poorer than pure-database filters. The method parameter is not supported when using Dynamic Groups.
Adding Database Models
If your app introduces a new type of object in Nautobot, you'll probably want to create a Django model for it. A model is essentially a Python representation of a database table, with attributes that represent individual columns. Model instances can be created, manipulated, and deleted using queries. Models must be defined within a file named models.py.
It is highly recommended to have app models inherit from at least nautobot.apps.models.BaseModel which provides base functionality and convenience methods common to all models.
For more advanced usage, you may want to instead inherit from one of Nautobot's "generic" models derived from BaseModel -- nautobot.apps.models.OrganizationalModel or nautobot.apps.models.PrimaryModel. The inherent capabilities provided by inheriting from these various parent models differ as follows:
| Feature | django.db.models.Model |
BaseModel |
OrganizationalModel |
PrimaryModel |
|---|---|---|---|---|
| UUID primary key | ❌ | ✅ | ✅ | ✅ |
| Object permissions | ❌ | ✅ | ✅ | ✅ |
validated_save() |
❌ | ✅ | ✅ | ✅ |
| Change logging | ❌ | ❌ | ✅ | ✅ |
| Custom fields | ❌ | ❌ | ✅ | ✅ |
| Relationships | ❌ | ❌ | ✅ | ✅ |
| Note | ❌ | ❌ | ✅ | ✅ |
| Tags | ❌ | ❌ | ❌ | ✅ |
Note
When using OrganizationalModel or PrimaryModel, you also must use the @extras_features decorator to specify support for (at a minimum) the "custom_fields" and "relationships" features.
Below is an example models.py file containing a basic model with two character fields:
# models.py
from django.db import models

from nautobot.apps.models import BaseModel


class Animal(BaseModel):
    """Base model for animals."""

    name = models.CharField(max_length=50)
    sound = models.CharField(max_length=50)

    def __str__(self):
        return self.name
Once you have defined the model(s) for your app, you'll need to create the database schema migrations. A migration file is essentially a set of instructions for manipulating the database to support your new model, or to alter existing models.
Creating migrations can be done automatically using the nautobot-server makemigrations <app_name> management command, where <app_name> is the name of the Python package for your app (e.g. animal_sounds):
Note
An app must be installed before it can be used with Django management commands. If you skipped this step above, run poetry install from the app's root directory.
Example output:
Migrations for 'nautobot_animal_sounds':
  /home/bjones/animal_sounds/nautobot_animal_sounds/migrations/0001_initial.py
    - Create model Animal
Next, apply the migration to the database with the nautobot-server migrate <app_name> command:
Example output:
Operations to perform:
  Apply all migrations: nautobot_animal_sounds
Running migrations:
  Applying nautobot_animal_sounds.0001_initial... OK
For more background on schema migrations, see the Django documentation.
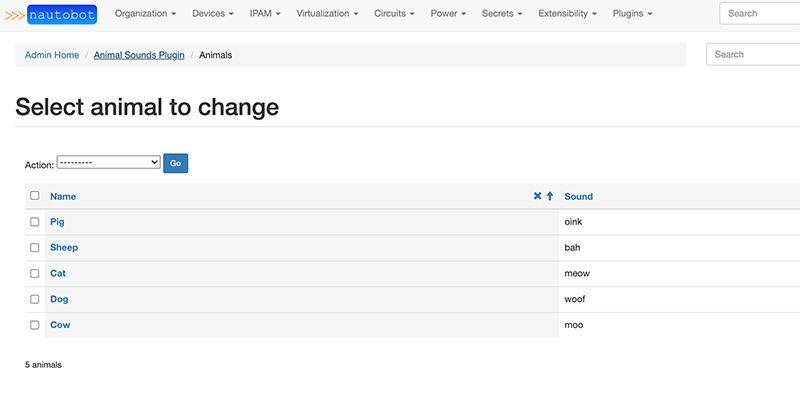
Using the Django Admin Interface
Apps can optionally expose their models via Django's built-in administrative interface. This can greatly improve troubleshooting ability, particularly during development. To expose a model, simply register it using Django's admin.register() function. An example admin.py file for the above model is shown below:
# admin.py
from django.contrib import admin
from nautobot.apps.admin import NautobotModelAdmin

from .models import Animal


@admin.register(Animal)
class AnimalAdmin(NautobotModelAdmin):
    list_display = ('name', 'sound')
This will display the app and its model in the admin UI. Staff users can create, change, and delete model instances via the admin UI without needing to create a custom view.
Integrating with GraphQL
Apps can optionally expose their models via the GraphQL interface to allow the models to be part of the Graph and to be queried easily. There are two mutually exclusive ways to expose a model to the GraphQL interface.
- By using the
@extras_featuresdecorator - By creating your own GraphQL type definition and registering it within
graphql/types.pyof your app (the decorator should not be used in this case)
All GraphQL model types defined by your app, regardless of which method is chosen, will automatically support some built-in Nautobot features:
- Support for object permissions based on their associated
Modelclass - Include any custom fields defined for their
Model - Include any relationships defined for their
Model - Include tags, if the
Modelsupports them
Using the @extras_features Decorator for GraphQL
To expose a model via GraphQL, simply register it using the @extras_features("graphql") decorator. Nautobot will detect this and will automatically create a GraphQL type definition based on the model. Additionally, if a FilterSet is available at <app_name>.filters.<ModelName>FilterSet, Nautobot will automatically use the filterset to generate GraphQL filtering options for this type as well.
# models.py
from django.db import models

from nautobot.apps.models import BaseModel, extras_features


@extras_features("graphql")
class Animal(BaseModel):
    """Base model for animals."""

    name = models.CharField(max_length=50)
    sound = models.CharField(max_length=50)

    def __str__(self):
        return self.name
Creating Your Own GraphQL Type Object
In some cases, such as when a model is using Generic Foreign Keys, or when a model has constructed fields that should also be reflected in GraphQL, the default GraphQL type definition generated by the @extras_features decorator may not work as the developer intends, and it will be preferable to provide custom GraphQL types.
By default, Nautobot looks for custom GraphQL types in an iterable named graphql_types within a graphql/types.py file. (This can be overridden by setting graphql_types to a custom value on the app's NautobotAppConfig.) Each type defined in this way must be a class inheriting from graphene_django.DjangoObjectType or graphene_django_optimizer.OptimizedDjangoObjectType and must follow the standards defined by graphene-django.
Nautobot uses a library called graphene-django-optimizer to decrease the time queries take to process. By inheriting from graphene_django_optimizer type classes are automatically optimized.
Warning
When defining types this way, do not use the @extras_features("graphql") decorator on the corresponding Model class, as no auto-generated GraphQL type is desired for this model.
# graphql/types.py
import graphene_django_optimizer as gql_optimizer

from nautobot_animal_sounds.models import Animal


class AnimalType(gql_optimizer.OptimizedDjangoObjectType):
    """GraphQL Type for Animal"""

    class Meta:
        model = Animal
        exclude = ["sound"]


graphql_types = [AnimalType]
Using GraphQL ORM Utilities
GraphQL utility functions:
execute_query(): Runs string as a query against GraphQL.execute_saved_query(): Execute a saved query from Nautobot database.
Both functions have the same arguments other than execute_saved_query() which requires a slug to identify the saved query rather than a string holding a query.
For authentication either a request object or user object needs to be passed in. If there is none, the function will error out.
Arguments:
execute_query():query(str): String with GraphQL query.variables(dict, optional): If the query has variables they need to be passed in as a dictionary.request(django.test.client.RequestFactory, optional): Used to authenticate.user(django.contrib.auth.models.User, optional): Used to authenticate.
execute_saved_query():saved_query_slug(str): Slug of a saved GraphQL query.variables(dict, optional): If the query has variables they need to be passed in as a dictionary.request(django.test.client.RequestFactory, optional): Used to authenticate.user(django.contrib.auth.models.User, optional): Used to authenticate.
Returned is a GraphQL object which holds the same data as returned from GraphiQL. Use execute_query().to_dict() to get the data back inside of a dictionary.
Adding Web UI Views
If your app needs its own page or pages in the Nautobot web UI, you'll need to define views. A view is a particular page tied to a URL within Nautobot, which renders content using a template.
NautobotUIViewSet
Added in version 1.4.0
New in Nautobot 1.4 is the debut of NautobotUIViewSet: A powerful app development tool that can save app developer hundreds of lines of code compared to using legacy generic.views. Using it to gain access to default functionalities previous provided by generic.views such as create(), bulk_create(), update(), partial_update(), bulk_update(), destroy(), bulk_destroy(), retrieve() and list() actions.
Note that this ViewSet is catered specifically to the UI, not the API.
Concrete examples on how to use NautobotUIViewSet resides in nautobot.circuits.views.
Below we provide an example on how to use NautobotUIViewSet on a theoretical app model.
from nautobot.apps.views import NautobotUIViewSet
from yourapp import filters, forms, models, tables
from yourapp.api import serializers

class YourAppModelUIViewSet(NautobotUIViewSet):
    bulk_create_form_class = forms.YourAppModelCSVForm
    bulk_update_form_class = forms.YourAppModelBulkEditForm
    filterset_class = filters.YourAppModelFilterSet
    filterset_form_class = forms.YourAppModelFilterForm
    form_class = forms.YourAppModelForm
    queryset = models.YourAppModel.objects.all()
    serializer_class = serializers.YourAppModelSerializer
    table_class = tables.YourAppModelTable
Setting ViewSet Attributes
One caveat of using the NautobotUIViewSet is that the queryset, serializer_class and table_class attribute of the YourAppModelUIViewSet has to be set before most of the NautobotUIViewSet functionalities will become available.
By default the URL patterns generated by a NautobotUIViewSet are based on the model's slug (/model-name/<slug>/ for the detail view, /model-name/<slug>/edit/ for the edit view, etc.). If your model lacks a slug field, or if you otherwise need to use a different field to look up an object, just override the default lookup_field in your ViewSet attributes:
from nautobot.apps.views import NautobotUIViewSet

class YourAppModelUIViewSet(NautobotUIViewSet):
    ...
    lookup_field = "pk"
    ...
Note
Using a field other than the default slug or the alternative field pk (as shown in the example above), may result in certain pieces of the UI not displaying (for example, the edit and delete buttons on the object detail view). This is due to the URL expecting a named key of slug or pk, rather than id.
View Template Context
Templates can benefit from a very rich context passed down from the views and renderer, including forms, tables, as well as any other information that may be helpful for rendering templates. The keys it provides are as follows:
content_type: The ContentType object for the associated modelfilter_form: The FilterForm object for the associated modelform: A Form object for the associated model if relevant (Nonefor list and detail/retrieve views)object: An instance of the associated mode if available (Nonefor list and bulk operation views)permissions: Summary of user permissions for the given modelreturn_url: The relevant return URLtable: A Table object for the associated model if relevant (Nonefor detail/retrieve and update views)table_config_form: A TableConfigForm object for the associatedtable, providing the ability to customize the tableverbose_name: The singular form of the model's nameverbose_name_plural: The plural form of the model's name
An example from editing a Provider object:
{
    'content_type': <ContentType: circuits | provider>,
    'filter_form': <ProviderFilterForm bound=True, valid=Unknown, fields=(region;site;location;q;asn;tag)>,
    'form': <ProviderForm bound=False, valid=Unknown, fields=(name;slug;asn;account;portal_url;noc_contact;admin_contact;comments;tags;object_note)>,
    'object': <Provider: NautobotProvider>,
    'permissions': {'add': True, 'change': True, 'delete': True, 'view': True},
    'return_url': '/circuits/providers/nautobotprovider',
    'table': None,
    'table_config_form': None,
    'verbose_name': 'provider',
    'verbose_name_plural': 'providers'
}
Other context keys may be available for certain views:
editing: Provided for create and update views to help the template determine if this is a new or existing objectaction_buttons: Provided for the list view for the top of table buttons (such as "Add" and "Export")
You may see other context keys as well, but any not documented above should not be relied upon as they may be removed in a future release. Some examples of those are:
changelog_url: This can now be retrieved from the object itself, viaobject.get_changelog_url, if the object supports change-loggingobj: Please useobjectinsteadobj_type: Please useverbose_nameinsteadobj_type_plural: Please useverbose_name_pluralinstead
Excluding ViewMixins from NautobotUIViewSet
For app models that do not require certain views, simply inherit directly from the ViewMixin classes available in nautobot.apps.views instead of NautobotUIViewSet.
Concrete examples for excluding ViewMixins, checkout CircuitTerminationUIViewSet and CircuitTypeUIViewSet in nautobot.circuits.views.
## An app model viewset that does not support bulk views and operations
import nautobot.apps.views

class YourAppModelUIViewSet(
    nautobot.apps.views.ObjectListViewMixin,
    nautobot.apps.views.ObjectDetailViewMixin,
    nautobot.apps.views.ObjectEditViewMixin,
    nautobot.apps.views.ObjectDestroyViewMixin,
):

    filterset_class = YourAppModelFilterSet
    filterset_form_class = YourAppModelFilterForm
    form_class = YourAppModelForm
    queryset = YourAppModel.objects.all()
    serializer_class = serializers.YourAppModelSerializer
    table_class = YourAppModelTable
    # You do not need to specify attributes that are not needed.
Excluding unwanted urls from NautobotUIViewSetRouter is done for you at the ViewSet level. If you do not inherit the unwanted ViewMixins, the corresponding route from the router will not be published.
# urls.py
# All the urls correspond to BulkViewMixins will not be published when you register your ViewSet with the router.
router.register("yourappmodel", views.YourAppModelUIViewSet)
Template Naming for NautobotUIViewSet
Template naming is very intuitive in NautobotUIViewSet. In templates/yourapp folder, name your templates following the convention {model_name}_{action}.html.
| ViewMixins | action |
|---|---|
| ObjectListViewMixin | list |
| ObjectDetailViewMixin | retrieve |
| ObjectEditViewMixin | create/update |
| ObjectDestroyViewMixin | destroy |
| ObjectBulkDestroyViewMixin | bulk_destroy |
| ObjectBulkCreateViewMixin | bulk_create |
| ObjectBulkUpdateViewMixin | bulk_update |
For example, for a DetailView template for YourAppModel, the template name will be yourapp/yourappmodel_retrieve.html, for a BulkCreateView template for yourappmodel, the template name will be yourapp/yourappmodel_bulk_create.html and etc.
If you do not provide your own templates in the yourapp/templates/yourapp folder, NautobotUIViewSet will fall back to generic/object_{self.action}.html.
Since in many cases the create and update templates for a model will be identical, you are not required to create both. If you provide a {app_label}/{model_opts.model_name}_create.html file but not a {app_label}/{model_opts.model_name}_update.html file, then when you update an object, it will fall back to {app_label}/{model_opts.model_name}_create.html and vice versa.
NautobotUIViewSetRouter
With NautobotUIViewSet as the base UI ViewSet for YourAppModel, it is required to register your urls with the help of NautobotUIViewSetRouter.
For a concrete example on how to use NautobotUIViewSetRouter, see nautobot.circuits.urls.
Below is a theoretical urls.py file for YourAppModel:
from django.urls import path

from nautobot.apps.urls import NautobotUIViewSetRouter
from your_app import views


router = NautobotUIViewSetRouter()
router.register("yourappmodel", views.YourAppModelUIViewSet)

urlpatterns = [
    # Extra urls that do not follow the patterns of `NautobotUIViewSetRouter` go here.
    # changelog, notes and etc.
    ...
    path(
        "yourappmodels/<slug:slug>/changelog/",
        ObjectChangeLogView.as_view(),
        name="yourappmodel_changelog",
        kwargs={"model": yourappmodel},
    ),
    path(
        "yourappmodels/<slug:slug>/notes/",
        ObjectNotesView.as_view(),
        name="yourappmodel_notes",
        kwargs={"model": yourappmodel},
    ),
    ...
]
urlpatterns += router.urls
Added in version 1.5.1
Changelog and Notes views and URLs are now provided in the NautobotUIViewSet and NautobotUIViewSetRouter.
Utilizing Generic Django Views
The use of generic Django views can aid in app development. As an example, let's write a view which displays a random animal and the sound it makes. First, create the view in views.py:
# views.py
from django.shortcuts import render
from django.views.generic import View

from .models import Animal


class RandomAnimalView(View):
    """Display a randomly-selected Animal."""

    def get(self, request):
        animal = Animal.objects.order_by('?').first()
        return render(request, 'nautobot_animal_sounds/animal.html', {
            'animal': animal,
        })
This view retrieves a random animal from the database and and passes it as a context variable when rendering a template named animal.html, which doesn't exist yet. To create this template, first create a directory named templates/nautobot_animal_sounds/ within the app source directory. (We use the app's name as a subdirectory to guard against naming collisions with other apps.) Then, create a template named animal.html as described below.
Utilizing Nautobot Generic Views
Added in version 1.1.0
Via PR #14, some generic views have been exposed to help aid in plugin development. These views have some requirements that must be in place in order to work. These can be used by importing them from from nautobot.core.views import generic.
More documentation and examples can be found in Generic Views guide.
Extending the Base Template
Nautobot provides a base template to ensure a consistent user experience, which apps can extend with their own content. This template includes four content blocks:
title- The page titleheader- The upper portion of the pagecontent- The main page bodyjavascript- A section at the end of the page for including Javascript code
For more information on how template blocks work, consult the Django documentation.
{# templates/nautobot_animal_sounds/animal.html #}
{% extends 'base.html' %}

{% block content %}
    {% with config=settings.PLUGINS_CONFIG.nautobot_animal_sounds %}
        <h2 class="text-center" style="margin-top: 200px">
            {% if animal %}
                The {{ animal.name|lower }} says
                {% if config.loud %}
                    {{ animal.sound|upper }}!
                {% else %}
                    {{ animal.sound }}
                {% endif %}
            {% else %}
                No animals have been created yet!
            {% endif %}
        </h2>
    {% endwith %}
{% endblock %}
The first line of the template instructs Django to extend the Nautobot base template and inject our custom content within its content block.
Note
Django renders templates with its own custom template language. This template language is very similar to Jinja2, however there are some important differences to keep in mind.
Registering URL Patterns
Finally, to make the view accessible to users, we need to register a URL for it. We do this in urls.py by defining a urlpatterns variable containing a list of paths.
# urls.py
from django.urls import path

from . import views


urlpatterns = [
    path('random/', views.RandomAnimalView.as_view(), name='random_animal'),
]
A URL pattern has three components:
route- The unique portion of the URL dedicated to this viewview- The view itselfname- A short name used to identify the URL path internally
This makes our view accessible at the URL /plugins/animal-sounds/random/. (Remember, our AnimalSoundsConfig class sets our app's base URL to animal-sounds.) Viewing this URL should show the base Nautobot template with our custom content inside it.
Tip
As a next step, you would typically want to add links from the Nautobot UI to this view, either from the navigation menu, the Nautobot home page, and/or the Installed Plugins view.
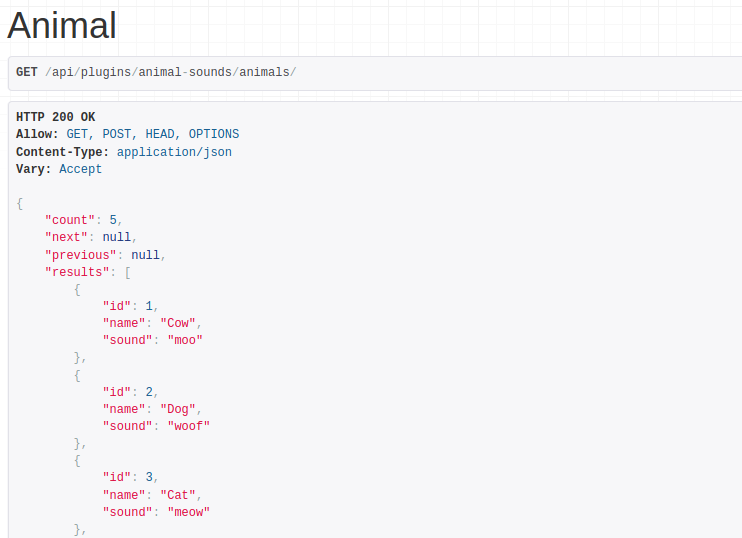
Adding REST API Endpoints
Apps can declare custom endpoints on Nautobot's REST API to retrieve or manipulate models or other data. These behave very similarly to views, except that instead of rendering arbitrary content using a template, data is returned in JSON format using a serializer. Nautobot uses the Django REST Framework, which makes writing API serializers and views very simple.
First, create a serializer for the Animal model, in api/serializers.py:
# api/serializers.py
from nautobot.apps.api import ValidatedModelSerializer

from nautobot_animal_sounds.models import Animal


class AnimalSerializer(ValidatedModelSerializer):
    """API serializer for interacting with Animal objects."""

    class Meta:
        model = Animal
        fields = ('id', 'name', 'sound')
Tip
For more full-featured models, you should use one of the other base classes from nautobot.apps.api such as NautobotModelSerializer.
Next, create a generic API view set that allows basic CRUD (create, read, update, and delete) operations for Animal instances. This is defined in api/views.py:
# api/views.py
from rest_framework.viewsets import ModelViewSet

from nautobot_animal_sounds.models import Animal
from .serializers import AnimalSerializer


class AnimalViewSet(ModelViewSet):
    """API viewset for interacting with Animal objects."""

    queryset = Animal.objects.all()
    serializer_class = AnimalSerializer
Tip
For more full-featured models, you should probably use nautobot.apps.api.NautobotModelViewSet as a base class.
Finally, register a URL for our endpoint in api/urls.py. This file must define a variable named urlpatterns.
# api/urls.py
from rest_framework import routers

from .views import AnimalViewSet


router = routers.DefaultRouter()
router.register('animals', AnimalViewSet)
urlpatterns = router.urls
With these three components in place, we can request /api/plugins/animal-sounds/animals/ to retrieve a list of all Animal objects defined.
Warning
This example is provided as a minimal reference implementation only. It does not address authentication, performance, or the myriad of other concerns that app authors should have.
Adding Help Documentation
If you are using the generic.ObjectEditView from Nautobot for your object, the form can automatically include a help icon with a link to that object's documentation. For this to happen, Nautobot must be able to find the documentation for this object in a specific directory tree within your app:
app_name/                   # "nautobot_animal_sounds"
  - static/
    - app_name/             # "nautobot_animal_sounds"
      - docs/
        - index.html
        - models/
          - object_model.html  # "animal.html"
Overriding Existing Functionality
Replacing Views
Added in version 1.4.0
You may override any of the core or app views by providing an override_views dict in an app's views.py file.
To override a view, you must specify the view's fully qualified name as the dict key which consists of the app name followed by the view's name separated by a colon, for instance dcim:device. The dict value should be the overriding view function.
A simple example to override the device detail view:
# views.py
from django.shortcuts import HttpResponse
from django.views import generic


class DeviceViewOverride(generic.View):
    def get(self, request, *args, **kwargs):
        return HttpResponse(("Hello world! I'm a view which "
                             "overrides the device object detail view."))


override_views = {
    "dcim:device": DeviceViewOverride.as_view(),
}
Note URL Endpoint
Added in version 1.4.0
Models that inherit from PrimaryModel and OrganizationalModel can have notes associated. In order to utilize this new feature you will need to add the endpoint to urls.py. Here is an option to be able to support both 1.4+ and older versions of Nautobot:
urlpatterns = [
    path('random/', views.RandomAnimalView.as_view(), name='random_animal'),
]

try:
    from nautobot.extras.views import ObjectNotesView
    urlpatterns.append(
        path(
            'random/<slug:slug>/notes/),
            ObjectNotesView.as_view(),
            name="random_notes",
            kwargs={"model": Random},
        )
    )
except ImportError:
    pass
Prometheus Metrics
Added in version 1.5.13
It is possible for Nautobot apps to provide their own Prometheus metrics. There are two general ways to achieve this:
- Use the
prometheus_clientlibrary directly in your app code. Depending on whether that code runs in the web server or the worker context, the metric will show up in the respective/metricsendpoint(s) (i.e. metrics generated in the worker context show up in the worker's endpoint and those generated in the web application's context show up in the web application's endpoint). - If the metric cannot be generated alongside existing code, apps can implement individual metric generator functions and register them into a list called
metricsin a file namedmetrics.pyat the root of the app. Nautobot will automatically read these and expose them via its/metricsendpoint. The following code snippet shows an example metric defined this way:
# metrics.py
from prometheus_client.metrics_core import GaugeMetricFamily

from nautobot_animal_sounds.models import Animal


def metric_animals():
    gauges = GaugeMetricFamily("nautobot_noisy_animals_count", "Nautobot Noisy Animals Count", labels=[])
    screaming_animal_count = Animal.objects.filter(loudness="noisy").count()
    gauges.add_metric(labels=[], value=screaming_animal_count)
    yield gauges


metrics = [metric_example]
Testing Apps
In general apps can be tested like other Django apps. In most cases you'll want to run your automated tests via the nautobot-server test <app_module> command or, if using the coverage Python library, coverage run --module nautobot.core.cli test <app_module>.
Factories
Added in version 1.5.0
The TEST_USE_FACTORIES setting defaults to False when testing apps, primarily for backwards-compatibility reasons. It can prove a useful way of populating a baseline of Nautobot database data for your tests and save you the trouble of creating a large amount of baseline data yourself. We recommend adding factory-boy to your app's development dependencies and settings TEST_USE_FACTORIES = True in your app's development/test nautobot_config.py to take advantage of this.
Performance Tests
Added in version 1.5.0
Running Performance Tests
You need to install django-slowtests as a part of your app dev dependency to run performance tests. It has a very intuitive way to measure the performance of your own tests for your app (all you have to do is tag your tests with performance) and do invoke performance-test to get the time to run your tests with NautobotPerformanceTestRunner.
NautobotPerformanceTestRunner is used by adding the flag --testrunner nautobot.core.tests.runner.NautobotPerformanceTestRunner to the coverage run command used for unit tests. This flag will replace the default NautobotTestRunner while retaining all its functionalities with the addition of performance evaluation after test
runs.
Checkout Performance Tests for more detail.
Gathering Performance Test Baseline Data
If you want to add baselines for your own test to nautobot/core/tests/performance_baselines.yml or have your own baseline yaml file for performance testing, specify a different file path for TEST_PERFORMANCE_BASELINE_FILE in app's development/test nautobot_config.py, and store the output of invoke performance-test --performance-snapshot command in that file. --performance-snapshot flag will store the results of your performance test to report.yml and all you need to do is copy/paste the result to the file set by TEST_PERFORMANCE_BASELINE_FILE. Now you have baselines for your own tests!
Example output of invoke performance-test --performance-snapshot:
tests:
  - name: >-
      test_run_job_with_sensitive_variables_and_requires_approval
      (nautobot.extras.tests.test_views.JobTestCase)
    execution_time: 4.799533
  - name: test_run_missing_schedule (nautobot.extras.tests.test_views.JobTestCase)
    execution_time: 4.367563
  - name: test_run_now_missing_args (nautobot.extras.tests.test_views.JobTestCase)
    execution_time: 4.363194
  - name: >-
      test_create_object_with_constrained_permission
      (nautobot.extras.tests.test_views.GraphQLQueriesTestCase)
    execution_time: 3.474244
  - name: >-
      test_run_now_constrained_permissions
      (nautobot.extras.tests.test_views.JobTestCase)
    execution_time: 2.727531
We recommend adding django-slowtests to your app's development dependencies to leverage this functionality to build better performing apps.